Download
 Browser
Why synced preview is so powerful
Game assets rarely live on a single layer. A character might have a body walk cycle on one layer, a weapon swing on another, and a shadow or FX pass on a third. If you can only preview one clip at a time, you are guessing how the pieces fit until you export and assemble them elsewhere.
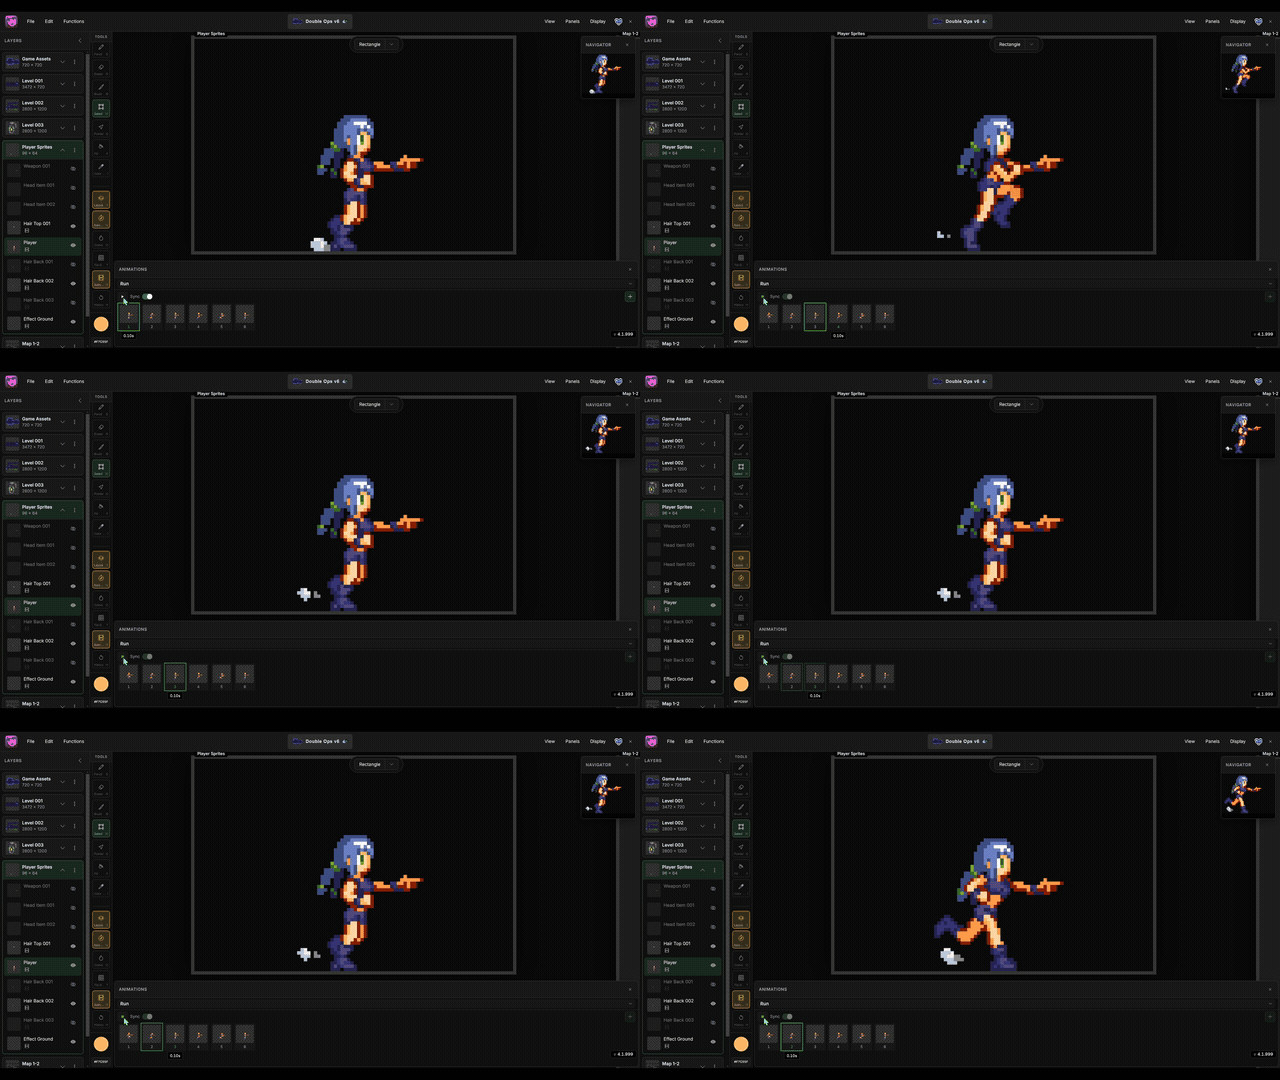
Synced animation preview keeps that feedback inside Manabit. Turn on Sync, choose which animation each layer should contribute, and play — every starred (or selected sync) clip advances together so you see the full asset while you still have the pencil in hand.
That matters when you are:
- Building multi-part sprites — body, gear, and effects stay in time while you adjust frames.
- Matching timing across layers — spot early/late hits, foot plants, or FX that fire on the wrong beat.
- Iterating without leaving the editor — tweak a frame, replay the sync, and keep drawing.
Sync any animation with any other layer
Sync is not limited to “animation 1 with animation 1.” Each layer can expose several named animations (idle, walk, attack, and so on). With Sync enabled, you set which animation on a layer is the sync source — typically with the star control on that animation row — so that layer contributes that clip when the stage plays in sync.
That means you can:
- Preview layer A’s walk against layer B’s walk.
- Or pair layer A’s attack with layer B’s slash FX — even if those clips sit at different positions in each layer’s animation list.
- Switch the sync source on a layer when you want to try a different combination without rebuilding the project.
Being able to sync any animation from one layer with any animation from another is what makes Manabit strong for asset creation: you compose the preview the way the game will compose the sprite, then refine frames until the mix feels right.
Choose what plays while you work
You stay in control of the preview stack:
- Enable Sync when you want layers to advance together.
- Star (or set) the sync source animation on each layer you care about.
- Play back to judge timing, silhouettes, and overlap before you commit more frames.
- Turn Sync off when you want to scrub or edit a single layer’s strip in isolation.
Use that flexibility to build assets in layers — base motion first, then overlays — without losing the ability to see the finished look on demand.
Export animations as strips for game engines
When the motion is ready, export without a separate packing step. From the export dialog, choose Animation strip to write a PNG laid out for engines and pipelines that expect sprite sheets: one row per animation, one column per frame.
- Animation strip PNG — drop into Unity, Godot, GameMaker, Phaser, and most custom loaders that slice sheets by frame size.
- GIF — share a quick preview or embed a looping clip in docs and pitches.
Strip export keeps frame order and animation rows consistent with what you previewed in Sync, so the file you ship matches the timing you already approved on the canvas.
Getting started
- Open the Animations panel to add frames, set durations, and manage named animations on the active layer.
- Add frames with + (duplicates the current frame), reorder by dragging, and set per-frame duration in milliseconds.
- Enable Sync, star the animations you want each layer to contribute, then play to preview the composite.
- Export an Animation strip when you are ready to drop the asset into your engine.
For panel controls and frame editing details, see the Animations panel reference. For character workflow ideas, see Character animation.